



Manufacturers use laser marking to identify parts, track products through production, and add durable branding to metals, plastics, glass, and other materials. Unlike ink printing, the process creates the mark directly on the workpiece without applying ink or labels.
Material composition, laser wavelength, pulse settings, and surface condition all affect the mark's appearance and durability. In this guide, HTLaser explains how laser marking works, compares the main methods and laser sources, and shows how to evaluate a marking process for industrial production.
How Does Laser Marking Work?
Laser marking works by concentrating light energy onto a small area of a material. When the surface absorbs that energy, it undergoes a controlled physical or chemical change. The resulting change creates a visible mark.
Depending on the material and laser settings, this interaction may cause oxidation, discoloration, foaming, surface texturing, or material removal.
Three factors largely determine the result:
- Laser wavelength: Influences how effectively the material absorbs the light.
- Energy delivery: Determines how much energy reaches the surface and how quickly it is delivered.
- Material properties: Composition, pigments, coatings, and surface finish affect the reaction.
Controlled heating can create a dark oxide mark on suitable stainless steel. On certain plastics, laser energy may produce a lighter mark through foaming or a darker mark through carbonization. Higher energy density can also remove material to create an engraved surface.
Step 1: Prepare the Marking Design
The operator creates or imports the required content into laser marking software. This may include a company logo, product number, serial number, QR code, or Data Matrix code.
The design must fit the available marking area. Small characters and 2D codes also require sufficient resolution and contrast for their intended inspection method.
Step 2: Select the Laser and Processing Parameters
The laser source is selected according to the workpiece material and desired mark. Processing parameters are then adjusted to control the surface reaction.
|
Parameter |
How It Affects Marking |
Possible Problem |
|
Laser Power |
Changes the energy delivered during processing. |
Too much energy can cause excessive melting, burning, or material removal. |
|
Scanning Speed |
Affects exposure time and the energy delivered along the marking path. |
Excessive speed may produce weak marks; slow scanning can cause overheating. |
|
Pulse Frequency |
Influences pulse spacing and, depending on the source, energy per pulse. |
Unsuitable settings may reduce contrast or create uneven surface effects. |
|
Pulse Duration |
Influences peak power and how energy interacts with the material. |
Unsuitable pulse conditions can produce excessive thermal effects or poor marking quality. |
|
Focus Position |
Changes spot size and energy concentration at the surface. |
Incorrect focus may create wider lines, blurred characters, or inconsistent marks. |
|
Passes and Hatch Spacing |
Control repeated exposure and the overlap of adjacent marking lines. |
Incorrect settings may cause uneven fills, excessive heating, or unwanted depth. |
These parameters interact. For instance, lowering scanning speed can increase energy delivered per unit length even when the selected laser power stays unchanged. On pulsed systems, changing repetition frequency can also alter pulse overlap and pulse energy, depending on the laser's operating mode.
Step 3: Focus the Beam and Mark the Surface
The optical system focuses the laser onto the workpiece. In many industrial marking machines, galvanometer-driven mirrors move the beam rapidly across the marking field.
The beam follows the programmed path, creating the required surface modification. For larger or curved parts, suitable 3D focusing systems or rotary fixtures can help maintain the correct working distance.
Step 4: Inspect the Finished Mark
After marking, inspect the position, contrast, line quality, and surface condition. For machine-readable codes, check whether the intended scanner can read the mark under realistic operating conditions.
What Are the Main Types of Laser Marking?
Laser marking methods differ mainly in how they change the material surface. Some create color contrast with little material removal, while others remove a layer or produce a deeper impression.
Laser Annealing and Oxidation
Laser annealing uses controlled heat to change a metal surface, often producing an oxide layer that appears darker than the surrounding material.
This method is commonly used on stainless steel, titanium, and selected metal alloys where a smooth surface is desirable.
Typical uses: Serial numbers, instrument identification, logos, and fine markings on metal parts.
Annealing generally removes little material. However, surface corrosion behavior can change depending on the alloy and processing conditions. Parts exposed to aggressive cleaning chemicals or corrosive environments require appropriate durability testing.
Laser Foaming and Carbonization
These methods are commonly associated with plastic marking.
Foaming creates small gas bubbles or changes within compatible polymers, producing a lighter appearance through changes in how the surface scatters light.
Carbonization causes localized darkening in suitable materials, often creating dark marks on lighter plastic surfaces.
Not all plastics react the same way. Polymer grade, colorants, fillers, and laser-marking additives can significantly change the final contrast.
Laser Etching, Engraving, and Ablation
Laser etching modifies or removes a relatively small amount of surface material to create text, symbols, and patterns.
Laser engraving removes more material to form a deeper cavity. It may be useful when a mark needs to remain visible after abrasion or certain finishing operations.
Laser ablation refers to material removal by laser energy. It can remove coatings, oxide layers, or substrate material, depending on the laser and processing conditions.
Selectively removing a colored coating from a metal surface can expose a contrasting layer underneath without requiring deep engraving of the base metal.
Laser Marking vs. Engraving vs. Etching: What's the Difference?
Laser marking is the broader term. Engraving and etching are methods that can be used to create laser marks.
The practical difference is usually the amount of surface modification, not simply whether a laser is involved.
|
Method |
Surface Change |
Typical Application |
Main Consideration |
|
Color-Change Marking |
Changes appearance with little material removal. |
Serial numbers, logos, and surface identification. |
Contrast and durability depend on the material and environment. |
|
Laser Etching |
Produces shallow surface modification or removal. |
Part numbers, detailed text, and 2D codes. |
Surface texture and code readability must be controlled. |
|
Laser Engraving |
Removes material to create a deeper impression. |
Deep identification and wear-resistant patterns. |
Material removal may affect thin walls, coatings, or critical surfaces. |
Which method should you choose? Use the required surface condition and service environment as your starting point.
A smooth identification mark may be preferable on a finished stainless steel component. A deeper engraved mark may be appropriate for a part exposed to substantial abrasion. However, depth alone does not guarantee better durability, and engraving may not be acceptable on dimensionally sensitive parts.
What Materials Can Be Laser Marked?
Laser marking works on many metals and non-metallic materials, but compatibility depends on the exact material formulation and the laser wavelength.
The following table provides starting points for selecting a laser source. It does not replace testing on actual production parts.
|
Material |
Common Laser Options |
Possible Marking Results |
What to Check |
|
Stainless Steel |
Fiber; selected UV systems |
Dark marks, surface etching, engraving. |
Contrast, corrosion requirements, surface finish. |
|
Aluminum |
Fiber; selected UV systems |
Surface texturing, engraving, coating removal. |
Alloy, reflectivity, coating or anodized layer. |
|
Copper and Brass |
Suitable fiber or UV systems |
Surface modification, identification, engraving. |
Reflectivity, laser absorption, heat input. |
|
Engineering Plastics |
UV, fiber, or CO2 depending on formulation |
Color change, foaming, carbonization, or texturing. |
Resin grade, pigments, additives, deformation. |
|
Glass |
Suitable CO2 or UV systems |
Frosted or modified surface appearance. |
Glass composition, cracking, mark size, geometry. |
|
Paper, Cardboard, Wood, and Leather |
CO2 |
Darkened surfaces, etched patterns, product codes. |
Discoloration, burning, smoke, material consistency. |
|
Ceramics and Coated Surfaces |
Depends on the substrate and coating |
Surface color change, coating removal, texturing. |
Coating composition, adhesion, cracks, contrast. |
Why Can Two Similar Materials Produce Different Marks?
Material names alone do not fully describe laser compatibility.
Two plastic housings may use the same base polymer but contain different pigments or additives. One may produce a dark, high-contrast mark, while the other shows little visible change under similar conditions.
Metal surface finish also matters. Polished, brushed, anodized, painted, and untreated surfaces can respond differently to the same laser.
For reliable results, test the exact production material, including its final color, coating, and surface treatment.

Fiber vs. CO2 vs. UV Laser Marking: Which Should You Choose?
Fiber, CO2, and UV laser marking systems use different wavelengths. Because materials absorb light differently at different wavelengths, each laser type has its own strengths and limitations.
|
Laser Type |
Typical Wavelength |
Common Applications |
Key Limitation |
|
Fiber Laser |
Around 1 µm; 1064 nm is common |
Metal part marking, serial numbers, engraving, selected plastics. |
Not suitable for every transparent or heat-sensitive material. |
|
CO2 Laser |
Typically 10.6 µm |
Paper, cardboard, wood, leather, compatible plastics, glass. |
Generally unsuitable for direct marking of bare metals. |
|
UV Laser |
Commonly 355 nm |
Fine marking on suitable plastics, electronics, glass, and delicate components. |
Performance and processing speed depend on material and marking requirements. |
For each laser type, the material, its surface condition, and the marking requirements should be considered together. These common wavelengths are reference points; actual laser specifications vary by equipment model.
Choose a Fiber Laser for Most Metal Marking Applications
Fiber lasers are a common starting point for stainless steel, aluminum, titanium, and many other industrial metals.
They are used to produce serial numbers, identification codes, surface patterns, and engraved marks. Certain plastics can also be marked effectively when their formulations absorb the laser energy.
However, reflective materials, delicate coatings, and applications requiring specific surface properties may need specialized pulse settings or another laser source.
Choose a CO2 Laser for Many Non-Metallic Materials
CO2 lasers are commonly used for marking paper, cardboard, wood, leather, and compatible plastics.
They are particularly useful in packaging applications where manufacturers need to apply date codes, batch numbers, or other variable information.
Material thickness, color, coating, and processing speed affect the final result. Heat-sensitive packaging also needs careful testing to avoid unwanted burning or deformation.
Choose a UV Laser for Fine or Heat-Sensitive Marking
UV lasers can be effective for fine details on selected plastics, glass, electronic components, and coated materials.
The shorter wavelength can provide favorable absorption and a relatively small heat-affected area in suitable applications.
UV processing is sometimes called cold marking. However, this does not mean the process generates no heat or that all materials can be marked without damage.
Selection principle: Choose the laser source according to the required material reaction and marking quality, not simply the highest available power.
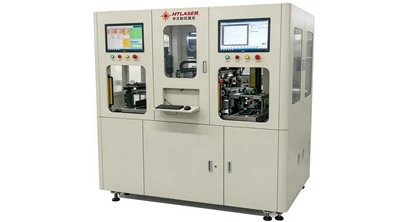
HTLaser offers fiber, UV, and CO2 laser marking systems, including 3D, handheld, automatic, and rotary-table configurations for different marking and production requirements.
Where Is Laser Marking Used in Manufacturing?
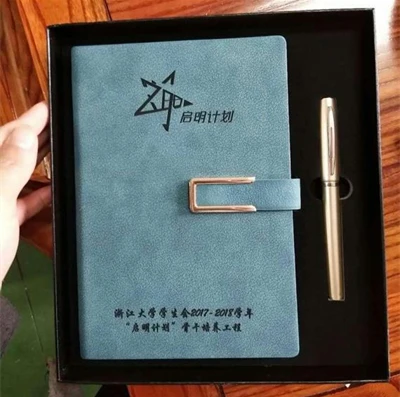
Industrial laser marking is widely used for product identification, traceability, branding, and component coding.
The most suitable marking method depends on both the material and what happens to the product after marking.
Automotive and Metal Component Traceability
Automotive and machinery manufacturers use laser marking for part numbers, batch identifiers, serial numbers, and Data Matrix codes on metal components.
Consider a stainless steel component that requires a machine-readable identification code. The manufacturer must determine not only whether the code looks clear after marking, but also whether it remains readable after cleaning, handling, and any required surface treatment.
For these applications, surface condition, code dimensions, scanner compatibility, and marking durability are critical.
Electronics and Plastic Components
Laser marking is used on suitable electronic housings, plastic connectors, switches, and small components where space for identification is limited.
A common challenge is achieving sufficient contrast without excessive heat or surface damage.
For a small plastic connector, the material grade and color should be confirmed before choosing between fiber and UV marking. The marking process must also avoid damaging functional surfaces or deforming the component.
Medical Device Identification
Medical devices and instruments may require durable identifiers for manufacturing control or regulatory traceability.
Laser marking can be used on suitable stainless steel instruments, polymer components, and device housings.
However, medical applications may have additional requirements for corrosion resistance, cleaning, sterilization, and code readability. The marking process must be validated against the applicable product and regulatory specifications.
Packaging and Product Coding
Packaging manufacturers use laser marking for expiration dates, batch numbers, logos, and product identification codes.
CO2 and UV systems can be used on different packaging materials depending on the substrate, film construction, and required mark.
For moving production lines, the marking system must account for conveyor speed, product positioning, code changes, and inspection requirements.
Curved and Irregularly Shaped Parts
Flat-field marking can become inconsistent when the surface height changes significantly across the marking area.
Suitable 3D dynamic focusing systems can compensate for variations in surface height. Rotary fixtures can also help position cylindrical parts such as rings, tubes, and round components.
The choice depends on the workpiece geometry, marking position, and required accuracy.
What Are the Benefits and Limitations of Laser Marking?
Key Benefits
- Durable identification: Laser marking creates surface changes that can provide lasting product identification when properly selected and validated.
- Non-contact processing: The marking head does not need to touch the workpiece, reducing mechanical contact and tool wear.
- Fine detail: Focused beams can produce small text, logos, and machine-readable codes.
- No marking ink: Direct laser marking does not require ink cartridges or printing ribbons.
- Production integration: Suitable systems can be combined with conveyors, rotary fixtures, cameras, and automated handling equipment.
Limitations and Safety Considerations
Laser marking is not suitable for every material or production requirement.
Some materials may produce poor contrast, excessive melting, discoloration, or surface damage. Deeper marking can also remove material from areas where dimensional accuracy or surface integrity is important.
Processing certain materials can generate fumes, particles, or potentially hazardous emissions. Laser radiation and reflected beams also require appropriate risk controls.
Appropriate safety measures may include equipment enclosures, guarding, interlocks, extraction, and operator procedures, depending on the laser system and processing hazards.
Before installing a marking system, assess the actual equipment configuration, laser classification, extraction requirements, operator access, and applicable safety standards.
How to Choose a Laser Marking Machine
Choosing a machine begins with the marking task, not a power rating or advertised scanning speed.
A practical selection process should confirm the material, required result, production conditions, and acceptance criteria before a machine configuration is finalized.
1. Define the Material and Marking Requirements
Prepare the following information:
- Exact material type, grade, color, and surface finish.
- Part dimensions and the available marking area.
- Required content, such as a logo, serial number, or Data Matrix code.
- Minimum character or code size.
- Required appearance, contrast, and marking depth.
- Cleaning, abrasion, coating, or other conditions the finished mark must withstand.
These details help identify the appropriate laser source and prevent unnecessary equipment trials.
2. Shortlist Suitable Laser Sources
Use material compatibility and marking requirements to identify candidate systems.
Fiber marking is a reasonable starting point for many bare metal parts. A heat-sensitive plastic may justify testing a UV system. A cardboard package may be better suited to a CO2 laser.
These are starting recommendations, not automatic purchasing decisions. If two technologies appear suitable, compare their results on the actual workpiece.
3. Conduct Sample Marking Tests
Testing real production parts helps determine whether the selected machine can achieve acceptable results.
A practical test sequence is:
- Prepare representative samples: Use the actual material, color, coating, and surface finish, including relevant production variations.
- Define the required result: Set the expected contrast, code dimensions, surface appearance, and any durability requirements.
- Test controlled parameter combinations: Adjust relevant laser settings systematically and record the resulting marks.
- Inspect the marks: Check appearance, dimensions, contrast, surface condition, and code readability.
- Perform application-specific tests: Evaluate the marks after cleaning, abrasion, coating, sterilization, or other relevant processes.
- Confirm repeatability: Repeat the selected process on multiple representative parts to identify unacceptable variation.
Keep records of the laser configuration, material details, tested settings, inspection results, and selected process window.
4. Verify Marking Quality and Code Readability
A mark that looks clear to the human eye may still fail automated inspection.
For Data Matrix codes, check readability under the intended production or field-scanning conditions. Where a formal quality grade is required, use an appropriate verification method and the acceptance criteria specified for the application.
ISO/IEC 29158:2025 describes a quality assessment methodology for direct part marks, including relevant imaging and grading conditions.
Important distinction: A successful scan confirms that a reader decoded a particular symbol under the tested conditions. It does not by itself establish a formal code-quality grade.
5. Evaluate Production Integration and Total Cost
A suitable laser source is only one part of a complete marking solution.
Review the loading method, fixture design, workpiece positioning, available floor space, safety enclosure, extraction system, maintenance requirements, and factory automation interfaces.
Calculate the full production cycle rather than relying only on the laser's advertised scanning speed.
Total cycle time includes part loading, positioning, marking, inspection, and unloading. A faster scanner will not necessarily increase output if handling or inspection is the main bottleneck.
Equipment cost should also include the required fixtures, safety systems, extraction, automation, installation, training, maintenance, and ongoing operating expenses.
At HTLaser, we develop standard and customized laser equipment for industrial applications. Our work includes laser source selection, mechanical configuration, control system integration, and equipment testing. More information about our laser equipment engineering and manufacturing capabilities is available in our company overview.
Common Laser Marking Problems and How to Fix Them
Inconsistent marking results can come from the material, machine setup, processing parameters, or part positioning.
Start by checking the simplest causes before making major parameter changes.
|
Problem |
Possible Causes |
Recommended Checks |
|
Low Contrast |
Poor wavelength absorption, unsuitable settings, material variation. |
Confirm material grade and surface condition; compare controlled parameter settings. |
|
Blurred Text |
Incorrect focus, unstable fixtures, excessive line width. |
Check workpiece height, focus position, part movement, and optical condition. |
|
Burning or Melting |
Excessive energy input or unsuitable laser-material interaction. |
Review power, speed, pulse settings, and whether another laser type is more suitable. |
|
Uneven Marking |
Surface height variation, inconsistent material finish, poor alignment. |
Inspect fixtures, working distance, surface uniformity, and positioning. |
|
Unreadable 2D Code |
Poor contrast, distorted cells, incorrect dimensions, unsuitable inspection lighting. |
Check code geometry, marking quality, scanner setup, and applicable verification requirements. |
|
Insufficient Mark Durability |
Unsuitable marking method or exposure to aggressive finishing conditions. |
Review the required service environment and perform relevant durability testing. |
When a previously stable process starts producing poor marks, first compare the current material, fixture position, focus, and equipment condition with the approved setup.
If those conditions have not changed, investigate the laser parameters and material response. Changing several settings simultaneously makes it harder to identify the actual cause.
Frequently Asked Questions
Is Laser Marking Permanent?
Laser marking creates a lasting change in the material surface, but its durability depends on the marking method and operating environment. Abrasion, corrosion, chemicals, and subsequent surface treatment can affect the result. For demanding applications, test the mark under the conditions the finished product will encounter.
Can Laser Marking Damage the Material?
Yes. Excessive energy or unsuitable processing conditions can cause melting, cracking, discoloration, deformation, or unwanted material removal. Selecting the correct laser source and optimizing the process helps control these effects. Sensitive or functional surfaces require application-specific testing.
Can Laser Marking Be Used on Transparent Plastics?
Yes, some transparent plastics can be laser marked, but compatibility depends on the polymer, additives, and laser wavelength. A material that transmits one wavelength may absorb another. Mark quality and optical clarity should be evaluated on actual samples before selecting equipment.
Can Laser Marking Produce QR Codes and Data Matrix Codes?
Yes. Industrial laser markers can create QR codes, Data Matrix codes, serial numbers, and other identification patterns. For automated traceability, the code must meet the required dimensions, contrast, and readability criteria. Formal quality verification may also be necessary.
Can Laser Marking Be Used on Curved Surfaces?
Yes. Suitable 3D focusing systems, rotary fixtures, or controlled workpiece positioning can support marking on cylindrical, curved, or uneven surfaces. The correct configuration depends on the part geometry, marking area, and required quality.
How Much Does a Laser Marking Machine Cost?
Laser marking machine prices vary according to laser type, power, working area, machine structure, and automation requirements. A manually operated desktop marker and an integrated production-line system have different costs. Compare quotations using the same material, marking requirements, cycle time, safety configuration, and acceptance criteria.
Conclusion: How to Select the Right Laser Marking Process
Laser marking offers manufacturers a precise, non-contact way to create durable product identification on metals, plastics, glass, and other compatible materials.
The best result comes from matching three factors: the material, the required mark, and the production conditions.
Defining the marking requirements, shortlist suitable laser sources, and test representative production parts. Confirm contrast, surface quality, durability, readability, and full production cycle time before approving the process.
If you are evaluating a laser marking project, contact our engineering team with your material details, marking design, and production requirements. We can help review suitable laser configurations and discuss sample marking tests for your application.